Since I switched to Fuji from Nikon I’ve been looking for the perfect camera bag to carry the system on my travels when I take the main set of gear, my X-Pro1 and assorted lenses and stuff. My old bags were all for big cameras and I wanted something classy that would handle the load. I’ve had a couple of Billingham bags, a 335 which I traded for a Packington many years ago. I still have the Packington, that gets used when needed, but it’s not really up to the job.
I use the Hadley Small for my X100s travel kit, usually stuffed inside a backpack business case when flying. I’ve also got an L2 “Alice” that I picked up secondhand for my TLR. My requirements for the X-Pro1 kit were quite precise, but I couldn’t find a bag that met my needs. It needed to handle the load of 1 body and 6 lenses, assorted accessories and a 13″ laptop, plus all the stuff I take with me when flying. I also wanted it to be expandable at need, plus slip over the handle of a suitcase. After lots of searching, I couldn’t find anything that would meet all my requirements, and I was being very picky. There are several bags on the market that come close, but nothing really made the cut. Eventually, I settled for the closest I could find, although I did investigate getting a custom bag made. I picked up a Hadley Pro in Sage green with tan trim, even though I knew it was missing a couple of things that I really wanted. The first thing was tripod loops. My Packington has them on the base, and I have a Gitzo traveler that I sometimes carry. A tweet to Billingham showed me an alternative method of attaching a tripod, which works.
Next issue was the luggage handle attachment. A tweet from Billingham said they’d have a solution, but when they came out with it, I didn’t like it. Their own solution was to hang it from the handle with a single attachment point (hell no!) or have the bag face in and add two straps with buckles to attach it to the luggage handle uprights. No, that’s not going to work either. When I put the bag on the luggage, or take it off, I want to do it fast. fiddling with buckles isn’t fast.
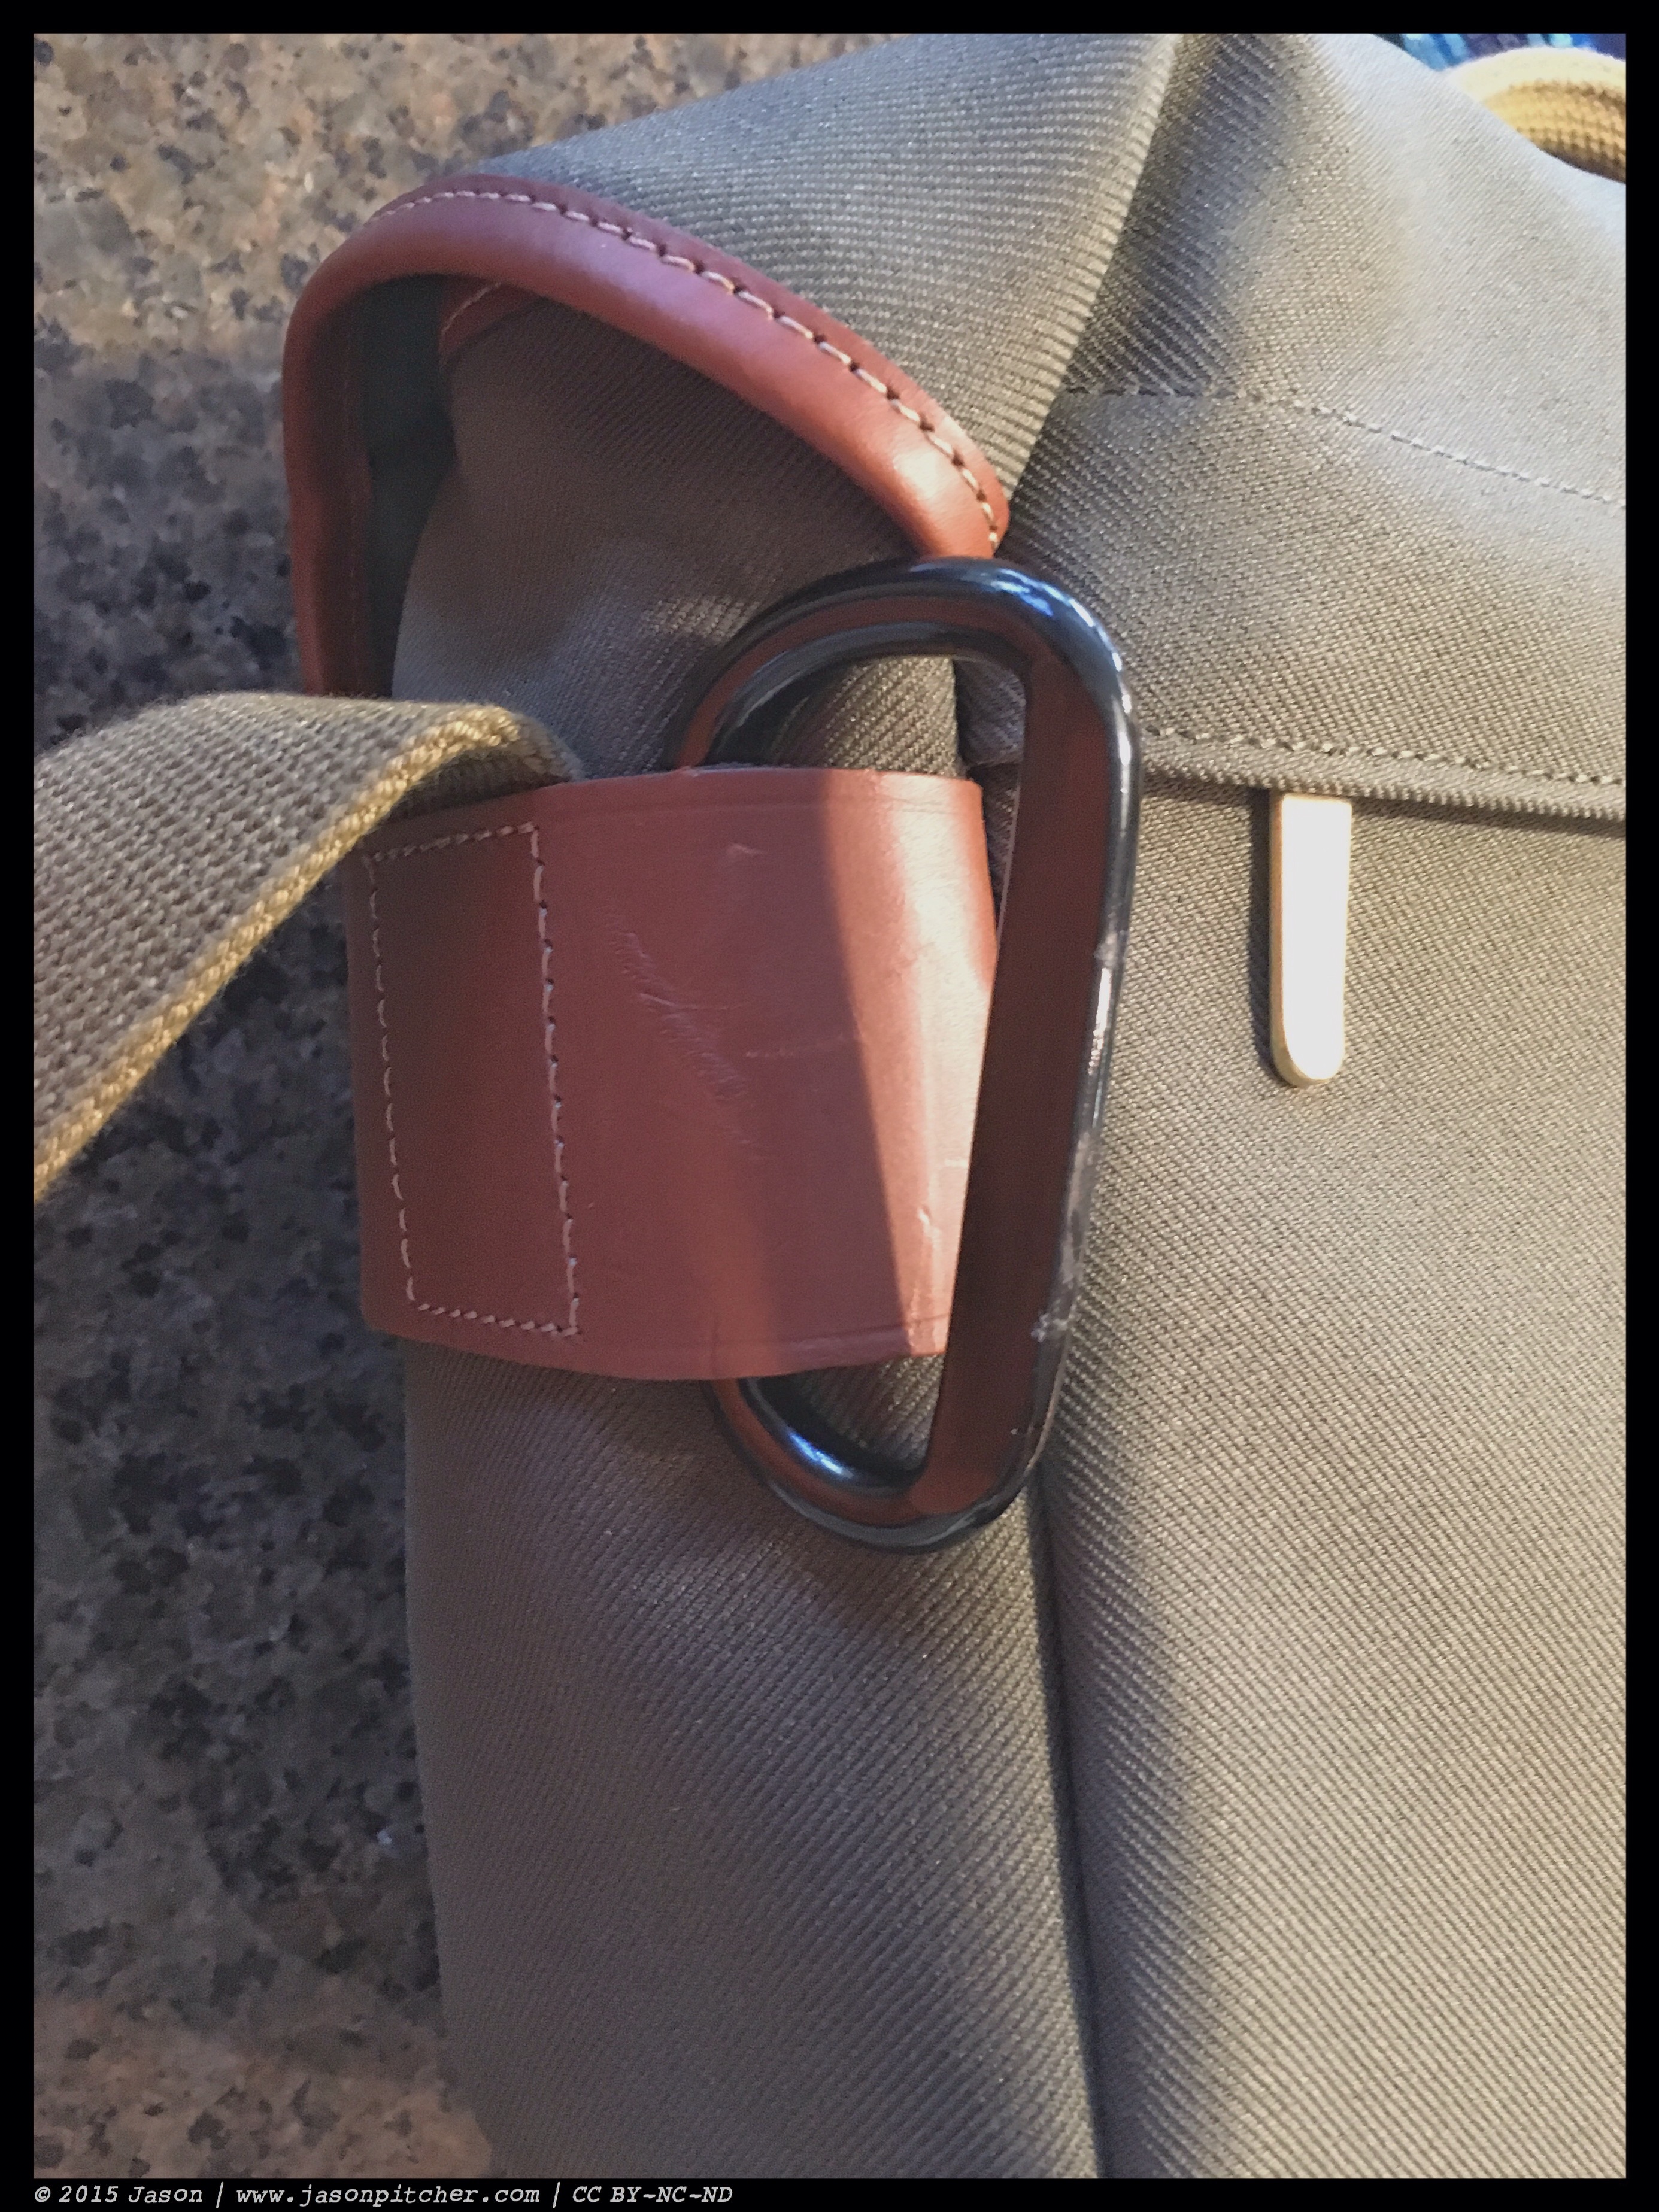
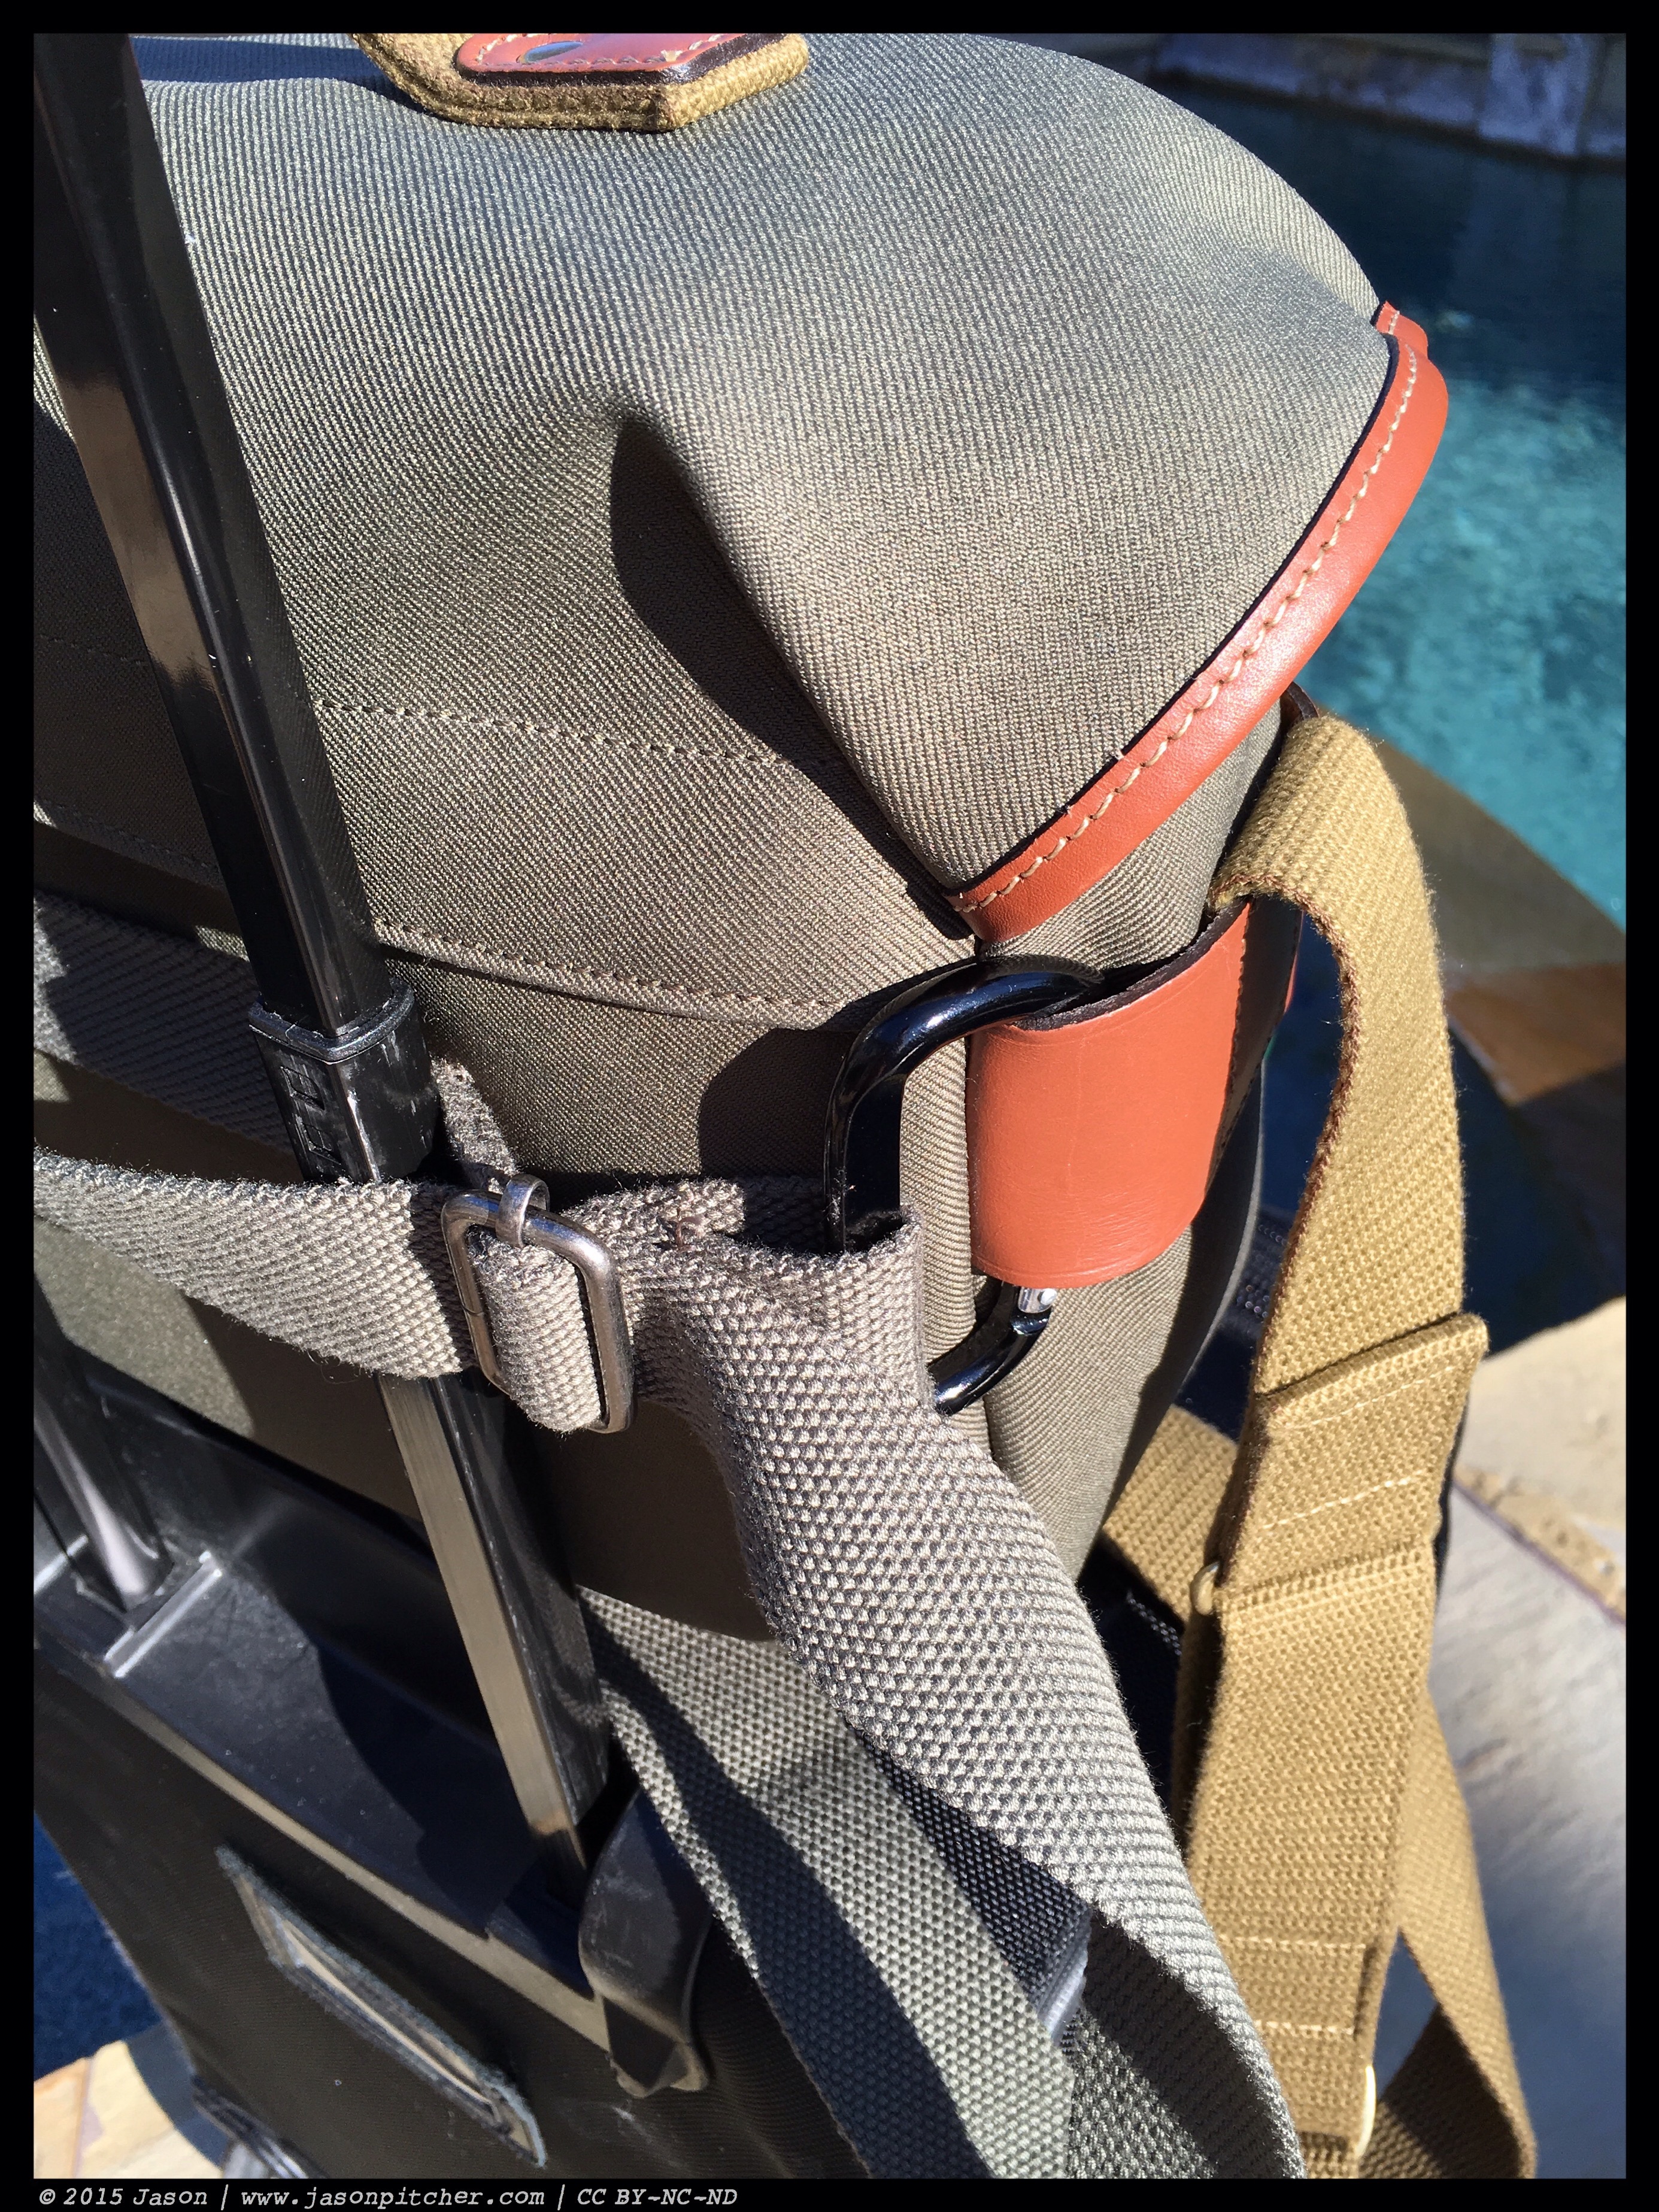
Plan B is to hack the bag to make a working solution. Well, close, but no damage was done to the bag. The start point is how to attach a strap to the back of the bag. Part of the attraction of the Hadley Pro is that you can add the Avea pockets to the sides of the bag. This gives a 2″ wide leather loop on both sides. A trip to the hardware store got me a couple of very cheap carabiners. I wouldn’t trust them to climb with, but they’ll work perfectly for this purpose.
A bit of twisting and they attach to the side loops. I put the gate inside the loop for additional security, but it you want the luggage strap easily removable, then you can mount them with the gate out.

Next is the strap. This was sourced from an old messenger style canvas bag I had lying around. It was actually a spare strap. I had to cut the stitching and strip all the hardware off, but the colour is close to the bag and it has two friction adjusters.
A bit of sliding and adjusting has the strap through both carabiners, with the friction adjusters forming a center loop. The center loop is critical for stability, so the bag doesn’t try to slide sideways off the handle or wrap around to the back.
I left the excess strap material for now while I fit the bag to various luggage handles. This is where the friction adjusters come in handy. I’ve got the ends of the strap doubled through them as well, so no sewing required, which is just as well.

Final result, still with the long strap tail – I’ll cut it and seal the end, but this is the final result. The strap holds the bag securely on top of the luggage, with no danger of it slipping off. It’s very fast to get on and off the bag and is easily adjustable for different luggage handle widths, even if they are wider than the bag. The beauty of this is that I can still fit the Avea side pockets without interference, giving me the extra capacity at need.
So this was a very simple and cheap solution. I could use nicer straight gate carabiners that aren’t angled, and I could use some brass friction sliders to match the rest of the hardware. Ultimately, those are cosmetic and won’t change the function of the strap.
This is a simple modification to a fantastic bag that makes it even more usable. This also leaves the front buckles free to attach a tripod using the tripod straps. If you have a Hadley Pro and travel with it, then this may make your life a little easier.
More to come….
Thank you! I LOVE my Billingham Hadley Pro, but this was the one issue I’ve been fighting.
Much appreciated.
Rachel